
Introduction
The decision to get lip fillers often comes with excitement. But the real journey begins after the procedure. The lip filler healing process is not instant. It unfolds in stages. Each stage has its own signs, symptoms, and care needs. Many people expect perfect lips overnight. That is not how the body works. Healing is gradual. It follows a natural rhythm.
Your lips go through swelling, tenderness, and adjustment. This is normal. It is your body responding. Understanding the process helps you stay calm. It also helps you avoid mistakes. Many issues happen because people panic too early. Or they ignore aftercare instructions.
This guide breaks everything down. Simple language. Clear expectations. No confusion. If you know what is coming, you handle it better. Healing becomes smoother. Results become better.
Let’s walk through the full timeline. Step by step. No fluff. Just facts that actually matter.
1. Immediate Aftermath: The First 24 Hours
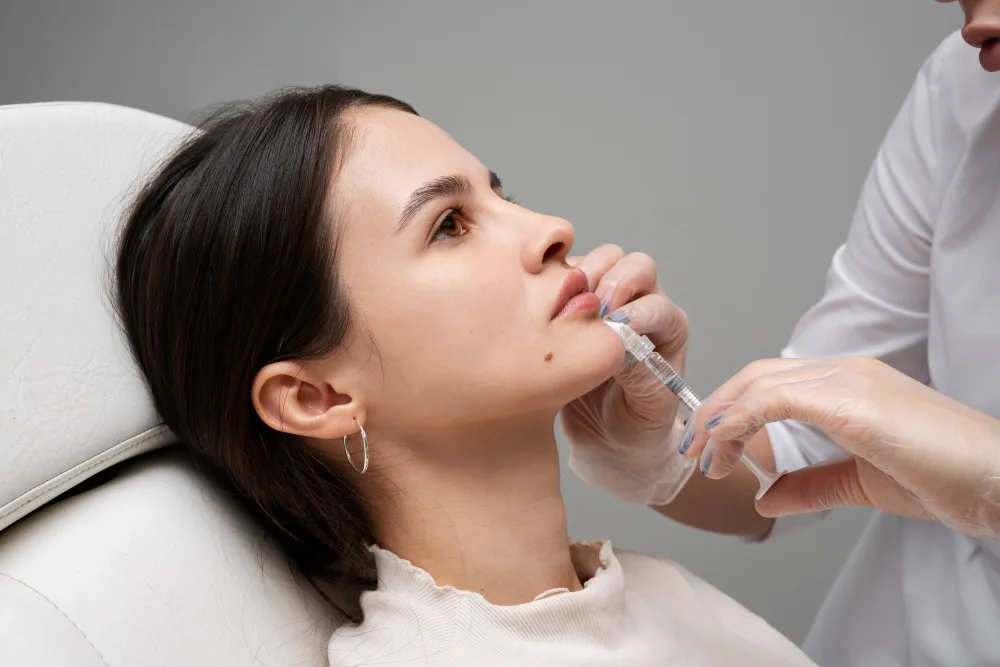
Right after the procedure, your lips will not look final. They will look bigger than expected. This is due to swelling. The injection process causes trauma to the tissue. Your body reacts instantly. Blood flow increases. Fluid builds up.
You may also notice redness. Small bumps can appear. These are injection points. Some people feel tightness. Others feel mild pain. This is completely normal.
Ice packs help during this stage. Apply them gently. Do not press hard. Avoid touching your lips too much. That can increase swelling. Also avoid hot drinks. Heat can worsen inflammation.
Sleeping position matters. Keep your head elevated. It reduces fluid buildup. Avoid sleeping on your face. Pressure can distort the filler.
This stage is not about judging results. It is about protection. Give your lips time. The real shape is hidden under swelling right now.
2. Day 2–3: Peak Swelling Phase
This is where things get intense. Swelling usually peaks during this time. Your lips may look uneven. One side may appear larger. This can feel worrying. But it is common.
Bruising can also become visible now. It may show as purple or blue patches. This happens when small blood vessels break during injection.
Tenderness may increase. Your lips might feel firm. Even slightly lumpy. This does not mean something went wrong. The filler is still settling.
Avoid strenuous activity. Exercise increases blood flow. That can worsen swelling. Stay hydrated. Water helps your body heal faster.
Some people feel regret during this stage. The lips look too big. Too uneven. But this is temporary. The body is still reacting.
Patience is key here. Do not rush into conclusions. Healing is still in progress. Let the process unfold naturally.
3. Day 4–7: Swelling Starts to Subside
This stage feels like relief. Swelling begins to reduce. Lips start looking more balanced. Bruising may still be present. But it fades slowly.
You will notice more definition. The shape becomes clearer. But it is still not final. There may be small irregularities. These often smooth out on their own.
Lips may feel dry. This is common. Use a gentle lip balm. Avoid harsh products.
You can return to normal activities. But still be cautious. Avoid excessive pressure on the lips. No aggressive massages unless advised.
At this point, many people start liking their results. Confidence builds. The lips look closer to what they imagined.
Still, this is a transition phase. Healing is not complete. Small changes will continue. Stay patient.
4. Week 2: Settling Phase Begins
By the second week, your lips look more natural. Swelling is mostly gone. Bruising has faded significantly.
The filler begins to integrate with your tissue. This is when results stabilize. Lips feel softer. Less tight. More like your own.
If there are minor lumps, they often reduce now. Gentle massage may be recommended. But only if your practitioner approves it.
This is also the right time for follow-up appointments. Adjustments can be discussed. Some people need a small touch-up. Others are already satisfied.
Do not rush for corrections too early. Week two gives a clearer picture. Before that, everything is still evolving.
This phase is where science meets patience. Your body is adapting. The filler is settling into place.
5. Week 3–4: Final Results Appear
Now we are talking real results. The lips have fully settled. Shape, volume, and symmetry become clear.
What you see now is close to the final outcome. Minor changes can still happen. But they are subtle.
The texture feels natural. Movement looks normal. No stiffness. No obvious signs of treatment.
If something still feels off, this is the time to address it. But most people feel satisfied by now.
Confidence peaks here. The waiting period is over. The healing journey pays off.
Remember, good results come from good healing. Rushing or interfering could have affected this stage.
Patience always wins in cosmetic treatments.
6. Common Side Effects During Healing
Not everything looks perfect during healing. And that is okay. Some common effects include swelling, bruising, tenderness, and dryness.
You may also feel small lumps. These usually soften over time. Uneven swelling is also normal.
Mild pain can occur. It fades within a few days. Severe pain is not normal. That needs attention.
Some people experience itching. This is part of healing. Avoid scratching. It can cause irritation.
Most side effects are temporary. They resolve on their own.
The key is knowing what is normal. And what is not. Awareness prevents unnecessary panic.
7. What to Avoid During Healing
Healing requires discipline. Some habits can delay recovery. Others can ruin results.
Avoid alcohol in the first 24–48 hours. It increases bruising. Stay away from smoking too. It slows healing.
Do not touch or press your lips unnecessarily. Bacteria can cause infection. Pressure can shift filler.
Avoid makeup on lips for at least a day. Keep the area clean.
Skip intense workouts for a few days. Heat and sweat can worsen swelling.
Also avoid extreme temperatures. No saunas. No very hot drinks.
Simple rule: treat your lips gently. Respect the process. Your future results depend on it.
8. Lip Filler Healing Timeline Summary
The lip filler healing process follows a pattern. First 24 hours bring swelling and redness. Days 2–3 bring peak swelling. Days 4–7 show improvement. Week 2 brings settling. Week 3–4 shows final results.
Each phase has its own purpose. The body repairs. Adjusts. Stabilizes.
Skipping aftercare can disrupt this flow. Following it enhances results.
Think of it like planting a seed. You cannot rush growth. But you can create the right conditions.
Consistency matters. Care matters. Patience matters.
Healing is not random. It is structured. Respect the timeline.
9. Tips to Speed Up Healing
You cannot skip healing. But you can support it.
Stay hydrated. Water helps tissue repair. Eat healthy foods. Nutrients boost recovery.
Use cold compresses in early stages. They reduce swelling.
Avoid stress. It affects healing. Sleep well. Rest is powerful.
Follow your practitioner’s advice strictly. They know what works.
Small actions make a big difference. Healing is a team effort. Your body and your habits work together.
10. When to Be Concerned
Most symptoms are normal. But some are not.
Severe pain is a red flag. Extreme swelling that does not reduce needs attention.
If you notice unusual discoloration, seek help. Especially if it looks patchy or pale.
Signs of infection include warmth, pus, and fever. Do not ignore these.
Early action prevents complications.
Trust your instincts. If something feels wrong, check it. Better safe than sorry.
11. Emotional Side of Healing
Healing is not just physical. It is mental too.
Many people feel anxious during swelling. Some regret their decision early on.
This is common. Temporary changes can feel overwhelming.
But emotions shift as healing progresses. Confidence returns. Satisfaction grows.
Understanding the process helps manage expectations.
Stay grounded. Trust the timeline. Your final results are worth the wait.
12. Long-Term Care After Healing
Even after healing, care matters. Keep your lips hydrated. Use good lip care products.
Avoid habits that damage lips. Smoking and dehydration reduce longevity.
Regular follow-ups help maintain results.
Lip fillers are not permanent. Maintenance sessions are needed.
Healthy habits extend results. Poor habits shorten them.
Think long term. Not just immediate result.
13. Factors That Affect Healing Time
Not everyone heals the same.
Your metabolism plays a role. Faster metabolism may break down filler quicker.
Lifestyle matters. Smoking slows healing. Hydration speeds it up.
Technique also matters. Skilled practitioners reduce trauma.
Your body’s response is unique. Some swell more. Others bruise less.
There is no one-size-fits-all timeline. But general patterns still apply.
14. Myths About Lip Filler Healing
There are many myths.
Some believe swelling means something went wrong. That is false. Swelling is normal.
Others think results are instant. Not true. Healing takes time.
Some fear lumps permanently. Most lumps are temporary.
Misinformation creates fear. Facts create confidence.
Always rely on credible information. Not random opinions.
15. Why Patience Matters Most
The lip filler healing process rewards patience.
Rushing leads to mistakes. Panic leads to unnecessary corrections.
Your body needs time. Respect that.
Good results are not just about the procedure. They are about healing.
Slow progress is still progress.
Trust the journey. The final outcome will reflect your patienc.
FAQs
1. How long does lip filler swelling last?
Usually 3–5 days. Mild swelling may last up to 2 weeks.
2. When will my lips look normal again?
Around 1–2 weeks for a natural look.
3. Are lumps normal after lip fillers?
Yes. They often soften within 1–2 weeks.
4. Can I exercise after lip fillers?
Wait at least 24–48 hours before intense workouts.
5. Is bruising common?
Yes. It usually fades within a week.
6. When can I wear lipstick again?
After 24 hours, if there is no irritation.
7. Do lip fillers hurt during healing?
Mild discomfort is normal. Severe pain is not.
8. Can I massage my lips?
Only if advised by your practitioner.
9. How long do results last?
Typically 6–12 months.
10. What should I avoid after fillers?
Alcohol, smoking, heat, and pressure on lips.
Final Thoughts + CTA
Healing is not glamorous. It is messy. Uneven. Slow. But it is necessary. The lip filler healing process is a journey. Not a moment.
If you want better results, respect the process. Follow aftercare. Stay patient. Trust your body.
For deeper understanding and reliable wellness insights, platforms like cureaware can be a helpful place to explore balanced information without noise.